There was a time when artificial nails meant sitting in a salon chair for two hours, inhaling acrylic fumes, and committing to weeks of maintenance. That era is over. As a nail technician, I have watched the industry shift dramatically toward high-quality, reusable options that rival even the most expensive sculpted gel sets. The modern press-on is no longer the flimsy plastic accessory of the past; it is a sophisticated beauty tool designed for the discerning minimalist.
Whether you are looking to save time, protect your natural nail plate, or simply change your look as often as you change your jewelry, this press on nails buying guide is designed to help you navigate the market like a pro. When chosen correctly and applied with precision, these nails offer a sleek, high-gloss glass finish that looks indistinguishable from a soft-gel manicure. They are particularly suited for those with short natural nail beds who crave elongation without the damage, or the professional who needs a pristine, office-appropriate look that can be removed for weekend gardening or wellness activities.
The secret lies not just in the application, but in selecting a kit that mimics the architecture of a natural nail—thin at the cuticle, durable at the free edge, and perfectly sized to your sidewalls.

The Visual Aesthetics: What High-End Press-Ons Look Like
To the untrained eye, a press-on might look like any other fake nail. However, as a specialist, I look for specific architectural details that separate a luxury set from a drugstore bargain. A high-quality press-on should mimic the optical properties of a healthy nail or a structured gel overlay.
Color & Opacity
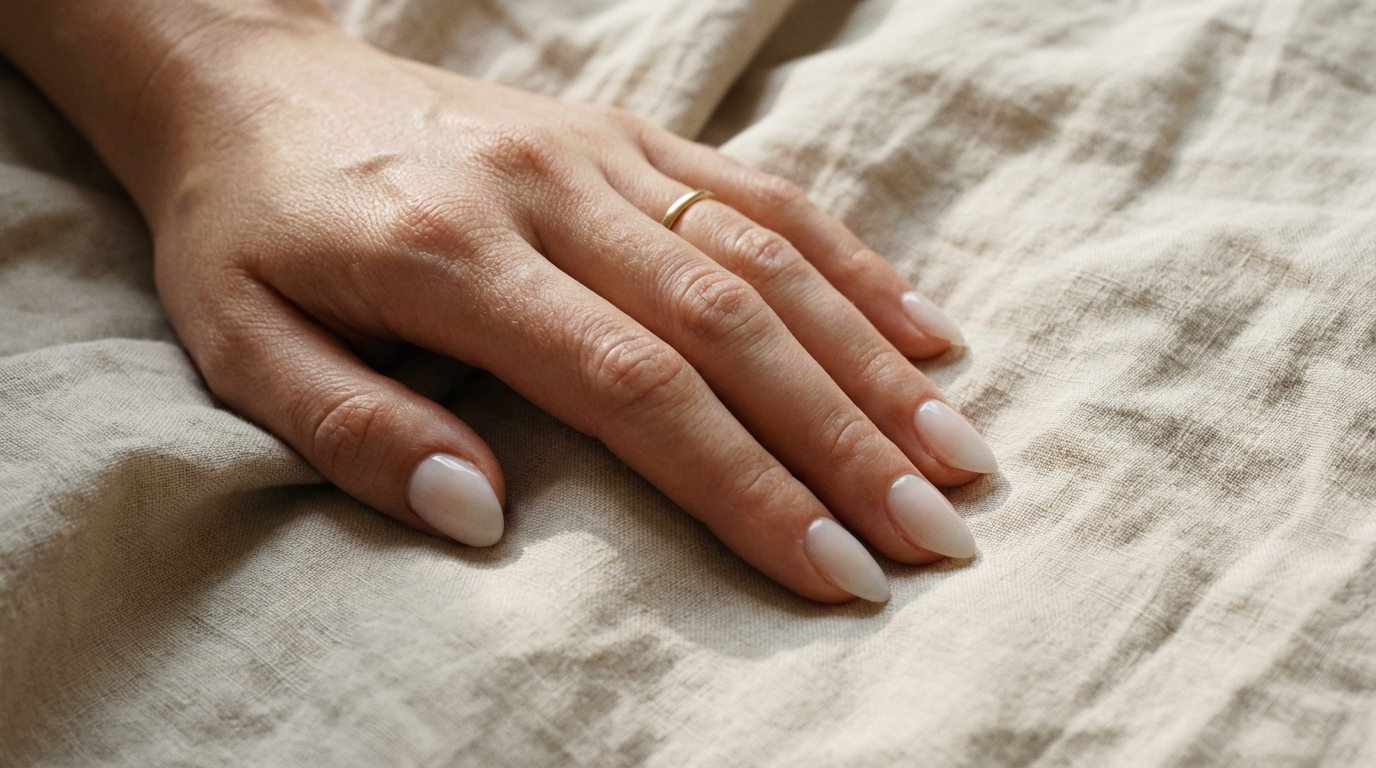
The most believable press-ons often utilize semi-sheer or milky color palettes. A “jelly” or translucent finish allows a hint of light to pass through, mimicking the depth of natural keratin. Opaque creams are beautiful, but they require a thinner application at the cuticle line to avoid looking like a “shelf” sitting on your finger.
Finish & Texture
We aim for a “wet look” or gel-like shine. The surface should be impeccably smooth, free of the micro-scratches often found on cheaper plastic molds. The best options capture that high-gloss glass finish usually reserved for top-tier UV top coats.
Shape & Architecture
This is where the magic happens. A superior press-on has a tapered cuticle area (extremely thin) for a flush fit, but gradually thickens toward the stress point and free edge. This structure, often referred to as the “apex,” provides the strength needed for daily wear while ensuring the cuticle line remains invisible.

Nail Style Profile: The Minimalist Press-On
| Feature | Description |
|---|---|
| Color Family | Nudes, Milky Whites, Soft Pinks, Muted Greige |
| Opacity | Semi-sheer to Medium Coverage (allows light diffusion) |
| Finish | High-Gloss Gel, Milky, or Soft Satin |
| Ideal Nail Length | Short to Medium (active length) |
| Ideal Nail Shape | Soft Almond or Rounded Squoval |
| Natural Appearance | Very Natural (if cuticle fit is flush) |
| Best For | Office wear, minimalist aesthetics, wedding guests, nail rehab |
Why the “Press On Nails Buying Guide” is Essential Reading
We are currently in the golden age of at-home manicures. Clients are realizing that subtle press-ons offer a level of control and health preservation that acrylics simply cannot matching. The popularity stems from the “zero-damage” promise. Unlike gel polish, which requires soaking in acetone that can dehydrate the nail plate and surrounding skin, press-ons can often be removed with warm water, oil, and patience.
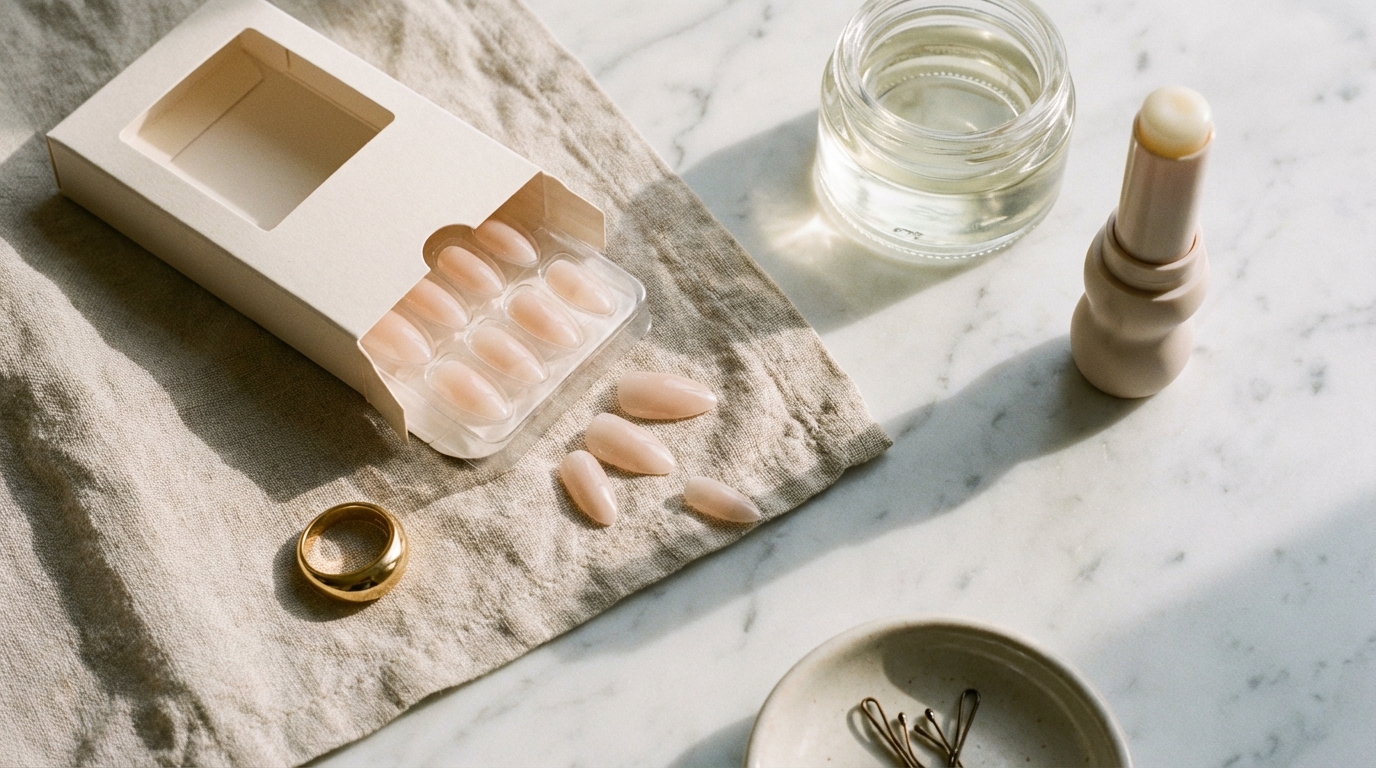
Furthermore, the realism has improved drastically. Manufacturers are now creating “soft gel tips”—press-ons made from actual gel resin rather than ABS plastic. These flex with your natural nail, preventing the painful popping sensation that occurs when a rigid plastic tip fights against a flexible natural nail.

How to Get This Nail Look
Achieving this aesthetic depends entirely on the source of your nails and the material they are made from.
At a Nail Salon (Custom Orders)
Yes, you can buy press-ons from a salon. Many licensed nail technicians now create custom-sized sets using professional gel products (often called “luxury press-ons”).
- What to ask for: Ask for a “custom sizing kit” first. Once you know your measurements, request a set made with “soft gel tips” (like Gel-X tips) painted with professional gel polish.
- What photos to show: Show images of neutral nail colors for office wear to emphasize that you want a clean, sophisticated look rather than heavy 3D art.
- What to avoid: Avoid technicians who use standard plastic tips for custom sets; you want the flexibility and durability of gel.
At Home (Retail Kits)
When shopping retail, you are looking for specific keywords on the packaging.
- Gel vs. Standard Plastic: Always prioritize nails labeled as “instant gel” or “acrylic resin.” These materials are thinner at the cuticle and stronger at the tip.
- The Finish: For the most natural finish, avoid designs with printed pixelated art. Stick to solid colors, gradients (baby boomer), or glazed finishes. These reflect light more naturally than flat prints.

Step-by-Step Application for the Most Natural Result
The difference between a press-on that lasts two hours and one that lasts two weeks is entirely in the prep. Treat this process like a surgical procedure—cleanliness is paramount.
1. The “Dry” Prep
Never soak your hands before application. Water expands the nail plate; as it shrinks back down, the adhesive will loosen. Push back your eponychium (cuticles) gently using a stainless steel pusher to create more surface area.
2. Etching and Dehydrating
Lightly buff the shine off your natural nail with a 180-grit buffer. You aren’t thinning the nail, just creating texture for the glue to grip. Pro Tip: Cleanse the nail plate with 70% alcohol or a dedicated dehydrator. This removes oils that are the enemy of adhesion.

3. Sizing Sidewall to Sidewall
Select a tip that fits exactly from one side of your nail to the other without force. If you are between sizes, choose the larger one and file the sides down. A tip that is too small will pop off instantly due to the pressure.
4. The 45-Degree Angle
Apply glue to both your natural nail and the back of the press-on. Align the press-on at a 45-degree angle near the cuticle, tuck it tightly under the cuticle fold, and slowly lower it. This technique pushes air bubbles out, preventing lifting and bacterial growth.

5. The Final Seal
Hold firm pressure for 30 seconds, focusing on the center and the sides. Visually, the nail should appear to grow out from under the skin, not sit on top of it.
Common Mistakes That Make Nails Look Fake
The “Lifting” Look
If you choose a press-on with a thick cuticle edge, it will catch in your hair and look bulky. Always opt for “tapered” styles. If your kit is too thick, use a file to thin out the bottom edge of the press-on before applying it.
Wrong Undertones
Just like foundation, nude nails have undertones. If you have cool skin and choose a yellow-based nude, the nails will look plastic and stark. Refer to guides on minimal nails that match any outfit to find neutral tones that harmonize with your skin’s natural coloring.
Poor Cuticle Fit
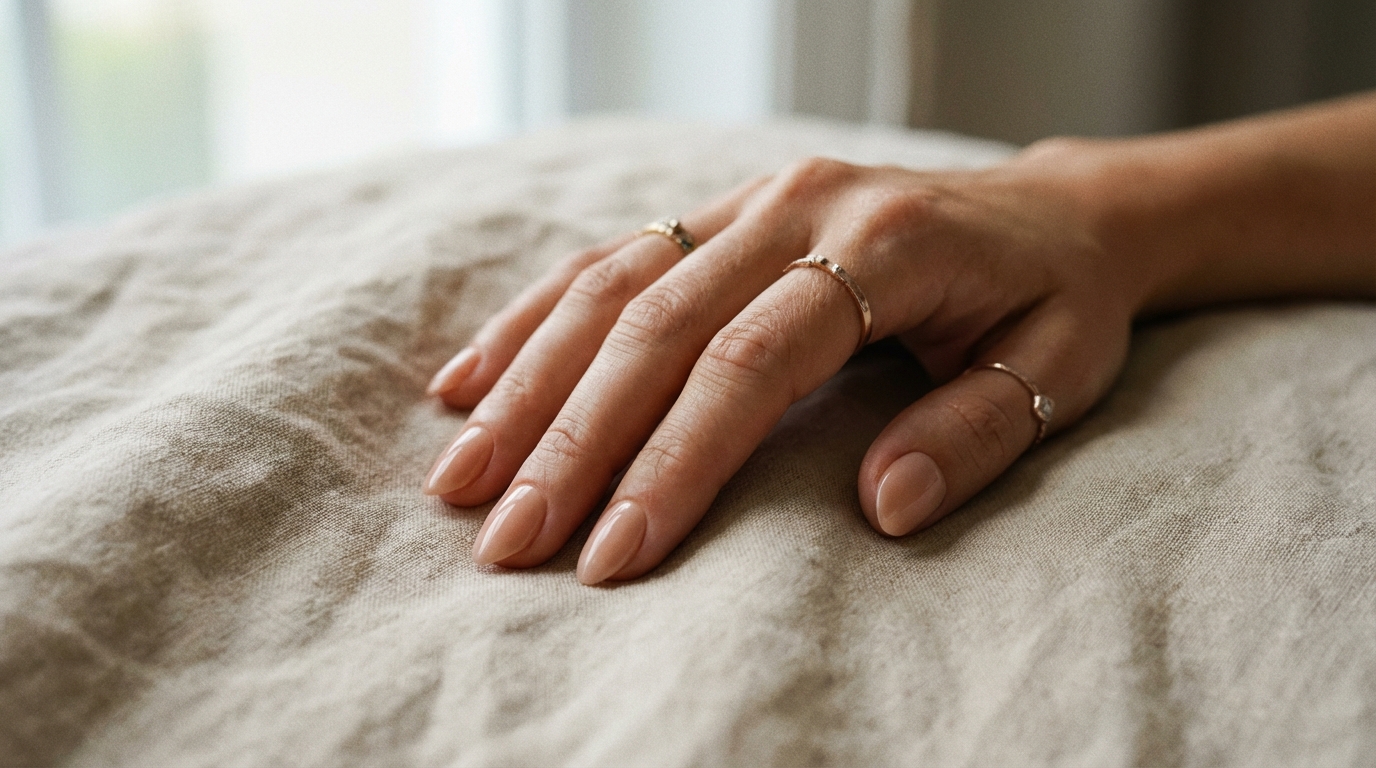
Leaving a gap between the press-on and your cuticle creates a ridge that screams “fake.” The press-on must sit flush against the proximal nail fold.

Maintenance and Longevity
With proper application (using liquid glue, not adhesive tabs), a high-quality set should last 10 to 14 days. To maintain that high-gloss finish:
- Hydrate the Skin, Not the Glue: Apply cuticle oil daily to keep the surrounding skin soft and prevent the press-on from looking dry and brittle. However, avoid getting oil underneath the nail tip.
- Gloves are Non-Negotiable: Hot water breaks down cyanoacrylate (nail glue). Always wear gloves when doing dishes.
- Top Coat Refresh: If the shine dulls after a week, lightly buff the surface and apply a fresh layer of gel top coat (if you have a lamp) or a high-quality traditional top coat to restore that glass-like appearance.

FAQ
How long do press-on nails realistically last?
With adhesive tabs, expect 1–3 days of wear (perfect for events). With high-quality nail glue and proper dehydration prep, 10–14 days is the industry standard. Factors like your natural nail oiliness and daily activity levels will vary this.
Do press-ons damage your natural nails?
Not if removed correctly. Damage comes from prying them off, which rips layers of keratin from your nail plate. Always soak them off using warm soapy water and oil, or a specialized glue remover.
What is the best shape for short, stubby fingers?
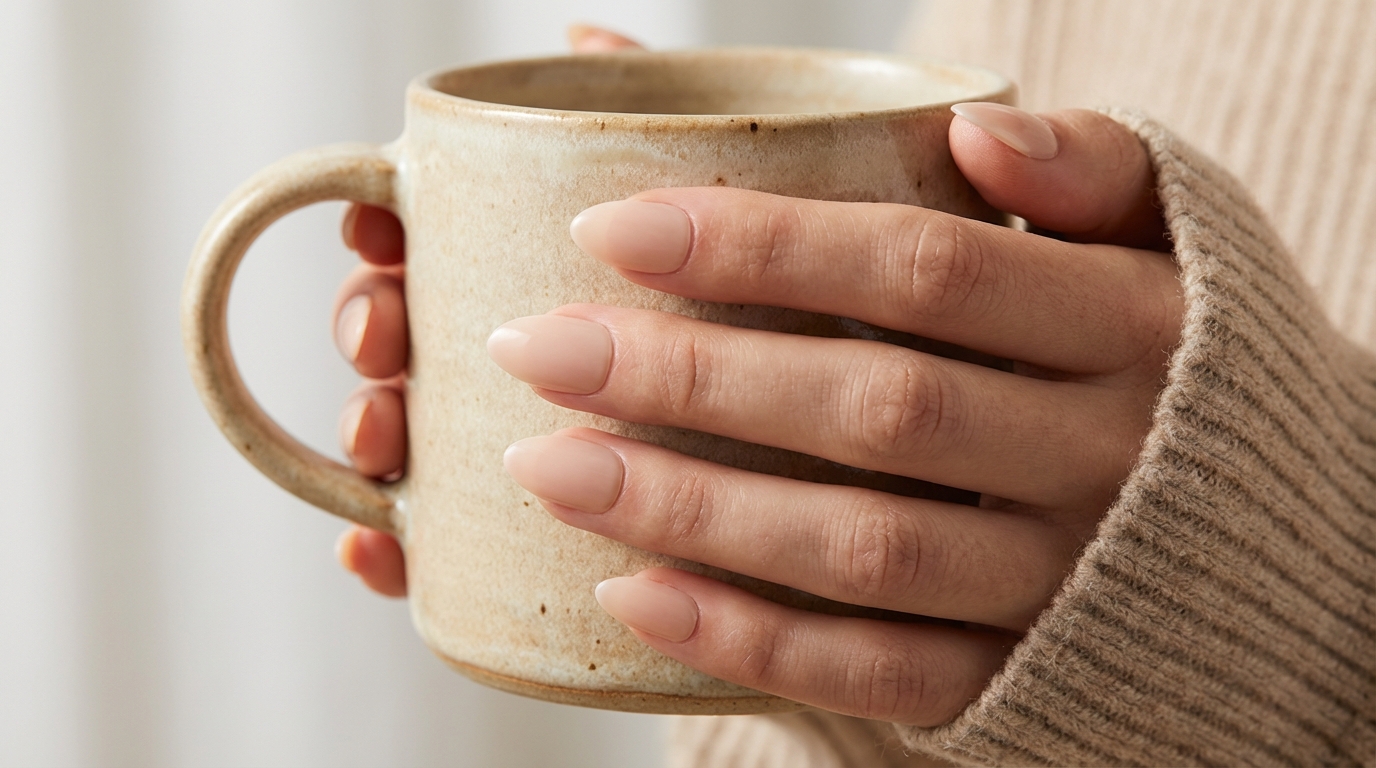
An Almond or Oval shape is universally flattering. It elongates the finger visually. Avoid wide square shapes, as they can make the hand appear shorter and wider.
Are “gel” press-ons better than regular plastic?
Absolutely. Soft gel tips are more flexible and shock-absorbent. If you hit your hand against a surface, a gel tip will flex, whereas a hard plastic tip might snap or pop off painfully.

Conclusion
Navigating the world of press-ons can feel overwhelming, but armed with this press on nails buying guide, you can confidently select a set that elevates your hands with minimal effort. Remember, the goal is an enhancement that feels like an extension of yourself—clean, polished, and sophisticated. Don’t be afraid to experiment with shape and length until you find your signature silhouette. Your hands are your primary tools of expression; dress them with the care they deserve.
For more insights on maintaining nail health while wearing enhancements, I recommend reading Allure’s extensive guide on press-on safety and care.