There is a quiet revolution happening in the nail industry. For years, the gold standard of grooming was the bi-weekly salon appointment—a rigid commitment to time, expense, and often, the health of the natural nail plate. But recently, I’ve seen a shift in my chair. Clients who crave a polished, high-end aesthetic without the commitment of acrylics are asking how to wear press on nails often while maintaining that salon-quality finish.
This isn’t about the plastic, rigid tabs of the past. Modern press-ons, particularly high-quality soft gel variations, offer a level of translucency and flexibility that rivals a sculpted gel manicure. This style suits the modern minimalist perfectly: the executive who needs short, clean squovals for typing, or the creative who wants long almond tips for a weekend event but returns to a natural look on Monday. It is the ultimate choice for those who view their hands as an extension of their wardrobe—interchangeable, curated, and impeccably maintained.

The Visual Aesthetic: What High-End Press-Ons Look Like
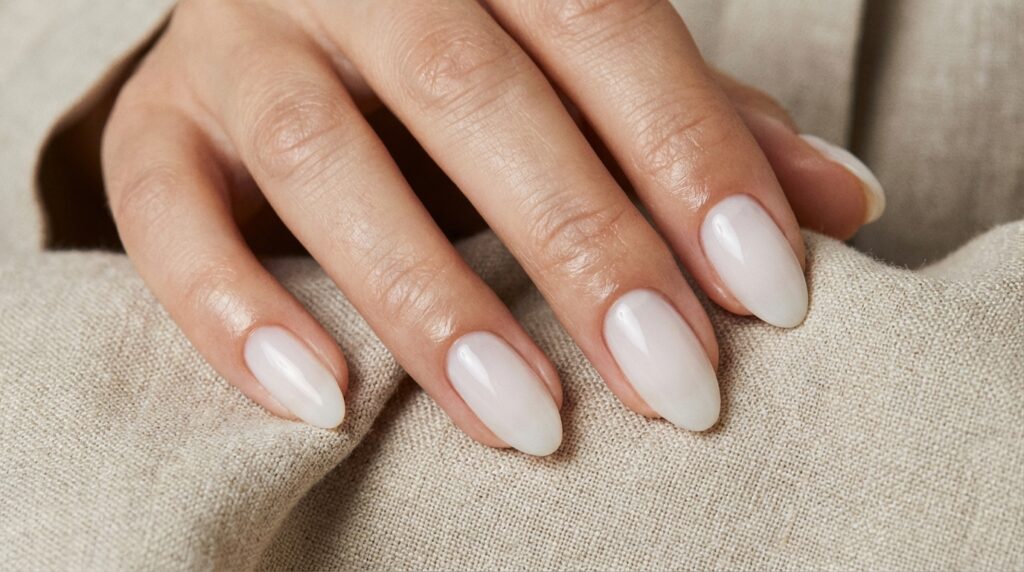
When applied correctly, a luxury press-on nail should be indistinguishable from a structured gel manicure or BIAB (Builder In A Bottle) overlay. The key characteristic I look for is the “flush transition.” This is where the extension meets the cuticle area so seamlessly that there is no visible ridge or step. The light should travel uninterrupted from the proximal nail fold down the center of the nail, reflecting a consistent, glassy shine.
In terms of color and finish, the most convincing styles lean towards milky nudes, sheer pinks, and soft-focus tints. Unlike traditional opaque polishes that can look flat on a plastic base, semi-sheer formulas allow light to refract through the nail, mimicking the depth of natural keratin. We call this the “jelly” or “soft-gel” finish. It blurs the visible nail line underneath without completely hiding it, creating a hyper-realistic appearance.
Shape is equally critical. For a believable look, the sidewalls must be perfectly parallel, tapering gently into the free edge. Whether you prefer a soft almond or a crisp squoval, the architecture of the nail should mimic a natural C-curve rather than looking flat and wide.

Nail Style Profile: The Minimalist Press-On
| Feature | Description |
|---|---|
| Color Family | Milky Whites, Sheer Nudes, Soft Rose, Translucent Beige |
| Opacity | Sheer to Semi-Sheer (allows light diffusion) |
| Finish | High-Gloss, Jelly, or Soft-Gel Luster |
| Ideal Nail Length | Short to Medium |
| Ideal Nail Shape | Squoval or Soft Almond |
| How Natural It Looks | Very Natural (mimics a healthy nail plate) |
| Best For | Office environments, delicate nail beds, minimalist wardrobes, frequent style changes |
Why Minimalists Choose to Wear Press On Nails Often
The decision to wear press on nails often is rarely just about saving money—though that is a benefit. It is predominantly about control and nail health. In my professional experience, the repeated trauma of over-filing during acrylic removal causes significant thinning of the nail plate. Press-ons, particularly those applied with adhesive tabs or soft-gel glue, bypass this damage cycle entirely.
Visually, they offer a crispness that is hard to maintain with natural nails. Natural nails are porous; they absorb water, expand, and eventually peel or break. A high-quality press-on acts as a protective shield, maintaining a perfect shape and high-gloss finish that doesn’t dull after a few days of hand washing. For the minimalist, this consistency is key. Your hands look groomed and intentional 24/7, without the chip anxiety associated with regular lacquer.
Furthermore, the variety allows for a curated aesthetic. You can match your nail length to your schedule—short for a heavy work week, long and tapered for a vacation—without waiting months for growth.

How to Get This Look: Salon vs. Home
At the Nail Salon
If you prefer a professional application, you aren’t asking for “press-ons” in the traditional sense. You are asking for Gel-X or Soft Gel Extensions. This is the pro-grade version of the look. A technician sizes a full-coverage clear tip to your nail, applies a gel adhesive, and cures it under an LED lamp. The result is waterproof, lasts 3-4 weeks, and has that perfect architectural structure. Avoid traditional acrylics if you want this specific translucent, lightweight feel.
At Home
To replicate this yourself, sourcing is everything. Avoid generic drugstore kits that come in rigid plastic sizes. Look for brands that offer “soft gel” tips or hand-painted sets. If you are looking for natural aesthetic press-ons, prioritize kits that include a variety of sizes (including half-sizes) to ensure a custom fit. If you are new to this system, you might want to explore the best press-on nail kits for beginners to find a brand that balances ease of use with professional quality.

Step-by-Step Application for the Most Natural Result
The difference between a nail that looks “glued on” and one that looks like a high-end manicure lies entirely in the prep work. Here is how I advise my clients to apply their sets.
1. The Canvas: Cuticle Work
Your natural nail plate must be immaculate. Gently push back the proximal nail fold (the skin behind the cuticle) using a metal pusher or orangewood stick. You want to expose the entire nail plate to create a seamless tuck zone for the press-on.
2. The Texture: Etching
Lightly buff the surface of your natural nail. We aren’t trying to thin the nail; we are simply removing the surface oils and creating a textured “scaffold” for the adhesive to grip. A 180-grit buffer is perfect for this.
3. The Chemical Prep
Pro Tip: Never skip dehydration. Wipe every nail thoroughly with 70% isopropyl alcohol or a dedicated nail dehydrator. Any trace of lotion or natural oil will cause the adhesive to lift prematurely, ruining the illusion.

4. The Application: The 45-Degree Angle
Whether using glue or tabs, approach the nail at a 45-degree angle. Slide the base of the press-on under the cuticle fold you pushed back earlier. This “tuck” is the secret to realism. Once positioned, slowly lower the rest of the nail to avoid air bubbles, which can look like white spots through sheer colors. Press down firmly for 30 seconds, rocking your thumb over the surface to bond the edges.
5. The Final Finish
Once applied, take a glass file and gently refine the tip. Sometimes the manufacturing process leaves a tiny tab at the end of the press-on. Filing this away ensures the silhouette is sharp and deliberate.
Common Mistakes That Make Nails Look “Fake”
Even the most expensive kit will look artificial if the fit is poor. The most common error I see is selecting a size that is too wide. If the press-on touches your skin on the sides (the lateral folds), it will not only hurt but will also lift within hours. It creates a bulky, flared look that screams “plastic.”
Always size down. If you are between sizes, choose the smaller one or file the larger one down to fit perfectly. The press-on should sit strictly on the nail plate, leaving a hairline gap between the product and your skin.

Another mistake is neglecting the underside. If you have longer natural nails, ensure they are trimmed short enough so they don’t peek out from underneath the press-on tips. Cleansing the underside with a little alcohol on a cotton bud keeps the look hygienic and translucent.
Maintenance and Longevity
To wear press on nails often and keep them looking pristine, you must treat them like jewels, not tools. While modern adhesives are strong, water is the universal solvent. I always recommend wearing gloves for doing dishes or using harsh cleaning chemicals. Water expands the natural nail, breaking the adhesive bond over time.
Daily hydration is non-negotiable. Apply a high-quality jojoba-based cuticle oil twice a day. This keeps the skin around the nail supple and prevents the adhesive from becoming brittle. For a comprehensive guide on keeping your set fresh, read our full Press-On Nails Maintenance Routine.

FAQ
How long can I realistically wear press-on nails?
With proper prep (buffing and dehydrating), liquid glue applications can last 10–14 days. Adhesive tabs generally last 1–3 days, making them ideal for weekend wear or special events.
Will wearing press-ons often damage my natural nails?
Damage usually occurs during removal, not wear. If you rip them off, you will peel layers of your natural keratin. Always soak them off in warm soapy water and oil, or use a dedicated adhesive remover. According to nail health experts at Allure, patience during removal is the single most important factor in preserving nail health.
Which shape looks the most natural?
A short squoval (square with rounded corners) or a short-to-medium almond shape tends to look the most natural. These shapes mimic the natural growth pattern of the nail plate.
Can I use gel top coat over press-ons?
Absolutely. Adding a layer of high-gloss gel top coat (cured under a lamp) can add depth and durability to a standard press-on, giving it that thick, glass-like salon finish.

Conclusion
Choosing to wear press on nails often is a sophisticated approach to beauty that prioritizes both aesthetics and autonomy. It allows you to maintain a flawless, high-gloss manicure that aligns with a minimalist sensibility, without being tethered to a salon schedule. By focusing on proper sizing, meticulous cuticle prep, and choosing sheer, high-quality finishes, you can achieve a look that is indistinguishable from a high-end gel extension. Trust your hands; with a little practice, this application can become a seamless ritual in your self-care routine.