There is a distinct difference between a manicure that looks like plastic tabs and one that mimics a high-end salon sculpted set. As a nail technician, I often steer clients toward high-quality soft-gel extensions when they cannot commit to bi-weekly salon appointments. The secret to that seamless, “grown from the cuticle” aesthetic lies entirely in your technique and your dedication to proper press on nail maintenance.
When done correctly, this style offers a crisp, tailored appearance that elongates the fingers without the bulk of traditional acrylics. It suits the modern minimalist perfectly—ideal for those who need everyday minimal nails that can survive a busy work week while maintaining a glass-like finish.

What this nail style looks like in real life
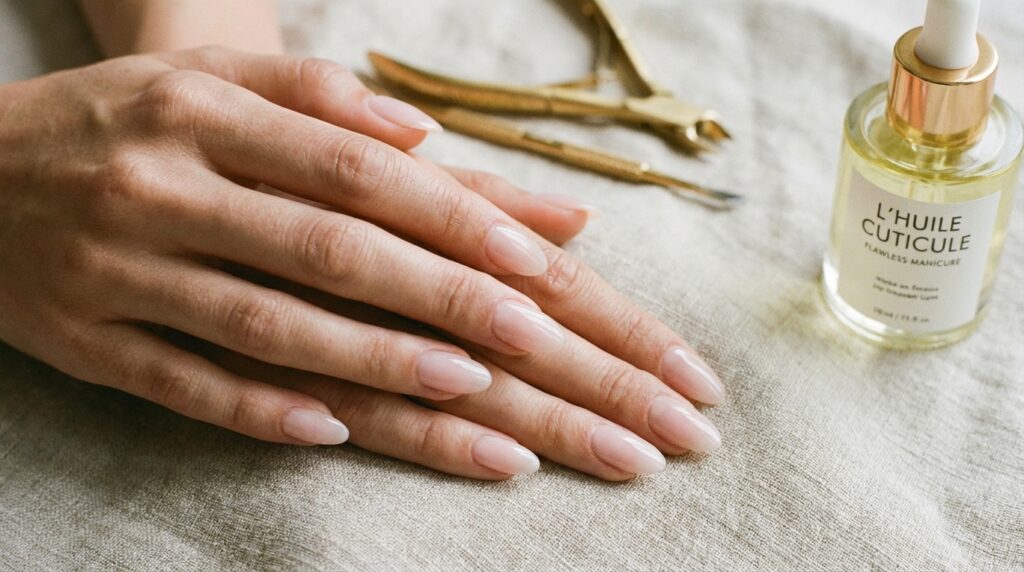
A properly applied press-on set should be virtually indistinguishable from a soft-gel overlay or a BIAB (Builder In A Bottle) manicure. We are moving away from the opaque, thick plastic look of the past. The goal is a semi-sheer or milky opacity that allows a hint of light to pass through the free edge, mimicking the translucency of natural enamel.
The finish should be hyper-glossy, often described as a “jelly” or wet-look shine. Unlike standard lacquer which can appear flat, modern press-ons utilize gel top coats that create a subtle dome effect, reflecting light perfectly along the vertical curve of the nail. The shape is crucial; tapered almonds and soft squovals (square-oval) offer the most believable silhouette, tapering gently to follow the natural sidewalls of your finger.
Nail Style Profile
| Feature | Description |
|---|---|
| Color Family | Nudes, Milky Whites, Sheer Pinks, Soft Mochas |
| Opacity | Semi-sheer to Medium Coverage |
| Finish | High-gloss, Gel-like, Glassy |
| Ideal Nail Length | Short to Medium (Active Length) |
| Ideal Nail Shape | Soft Almond or Tapered Squoval |
| Natural Look | Very Natural (if cuticle line is blended) |
| Best For | Office professionals, Minimalists, Event-specific wear |

Why “press on nail maintenance” is so popular for everyday nails
The surge in popularity isn’t just about convenience; it is about control. Clients are realizing that with a refined routine for press on nail maintenance, they can achieve a level of perfection that sometimes even rushed salon visits miss. It allows you to maintain a pristine, chip-free manicure for 10 to 14 days, with the flexibility to change lengths instantly.
Beyond the aesthetic, it protects the natural nail plate from the trauma of e-filing often associated with acrylics. By maintaining a barrier between your natural keratin and the environment, your hands look consistently groomed and expensive, regardless of your daily tasks.
How to get this nail look
At a nail salon
If you prefer a professional to handle the application, you aren’t asking for “press-ons” in the traditional sense. You are asking for Gel-X or Soft Gel Extensions. These are full-cover tips made of gel, cured onto your nail.
- Ask for: A full-cover soft gel extension system (like Apres Gel-X).
- Show photos of: Clean cuticle work and “flush” application where the extension meets the skin.
- Avoid: Standard acrylic tips, which add unnecessary thickness and lack the natural flexibility of the press-on look.

At home
To replicate the salon result, the material is everything. Avoid stiff ABS plastic; look for tips labeled as “soft gel” or “acrylic resin.” These materials are flexible, allowing them to mold to your natural C-curve for a seamless fit. For a deep dive into specific brands that pass the professional test, I recommend reading our Natural Looking Press-On Nails Review.
Step-by-step application for the most natural result
The difference between a 2-day wear and a 2-week wear is entirely in the prep. Do not rush this.

1. The Chemical Dehydration
Your natural oils are the enemy of adhesion. After pushing back your cuticles (gently!), buff the surface of your nail lightly to remove the shine. Pro Tip: Use a cotton pad soaked in 70% isopropyl alcohol or pure acetone to scrub the nail plate until it sounds “squeaky” clean. This creates the optimal pH and surface tension for the glue.
2. Sizing the Sidewalls
A press-on that is too large will lift immediately and look bulky. Measure your tips against your nail bed. If you are between sizes, always choose the larger size and file the sides down. The tip should sit flush inside your sidewalls without touching the skin.
3. The “Flush” Application
Apply glue to both your natural nail and the back of the press-on tip. Align the tip at a 45-degree angle near your cuticle line—but not on it. Press down slowly to push the air bubbles out towards the free edge. Hold firmly for 30 seconds. This technique ensures the cuticle area is flat and flush, not raised.

4. Blending the Seam
Once applied, take a glass file and gently buff the edge where the press-on meets your cuticle. This “blurs” the line of demarcation, making the nail look like it is growing out of your skin rather than sitting on top of it.
Common mistakes that make nails look fake or bulky
The Floating Cuticle: This occurs when the press-on is glued too far from the cuticle line or isn’t pressed down firmly enough at the base. It creates a “ledge” that catches hair and looks artificial.
Wrong Undertone: Just like foundation, nude nails have undertones. If you have cool, pink undertones in your skin, a yellow-based beige nail will look jarring and “plastic.” Always match the nail bed color to your natural flush.

Ignoring the Apex: Flat nails look unnatural. High-quality press-ons have a slight curve (apex) built in. If you press too hard and flatten this curve during application, the nail will rebound and pop off later. Let the glue fill the gap.
Maintenance and longevity
Longevity is an active process. To keep the finish glassy and the bond strong, treat your hands as you would your face—with a daily routine. According to beauty editors at Allure, hydration is non-negotiable for preserving the health of the nail and the flexibility of the manicure.
Water Protection: Prolonged exposure to hot water breaks down cyanoacrylate (nail glue). Wear gloves when washing dishes or showering for long periods. If you notice the shine dulling, wipe them down with an alcohol pad to remove surface oils and restore that “fresh set” gloss.

The Oil Routine: Apply cuticle oil twice daily. While oil lifts glue if applied before application, applying it after keeps the glue flexible and prevents it from becoming brittle and snapping under pressure. This is essential for Short Nude Nails That Look Expensive over the long term.
FAQ
How long should press-on nails realistically last?
With proper prep and high-quality glue, a set should last 10–14 days. If using adhesive tabs, expect 1–3 days of wear, which is ideal for weekend events.
Will press-ons damage my natural nails?
Damage comes from improper removal, not the nails themselves. Never rip them off. Always soak them in warm soapy water and oil, or pure acetone, to gently dissolve the bond.

What is the most natural-looking shape for press-ons?
A short-to-medium almond or a soft squoval is universally flattering. These shapes mimic the natural growth pattern of the nail plate, whereas sharp stilettos or wide squares often signal “artificial” immediately.
Can I use gel top coat over standard press-ons?
Yes. Lightly buff the surface of the press-on to create texture, apply a layer of gel base coat, cure, and then apply a non-wipe gel top coat. This adds durability and that coveted salon shine.
Conclusion
Mastering the art of press-on nails allows you to curate a polished, professional image on your own terms. It requires patience and a steady hand, but the result is a sophisticated manicure that rivals any salon service. Remember that maintenance is just as important as application; treat your hands with care, and your nails will reward you with lasting elegance.