There is a specific, quiet luxury associated with a flawless structured manicure. It suggests attention to detail and a polished lifestyle. For years, achieving this level of refinement required bi-weekly salon appointments and exposure to UV lamps. However, the landscape of nail artistry has shifted. Modern soft-gel enhancements—specifically high-quality press-ons—offer that same glass-smooth finish and architectural strength without the salon commitment.
This style is particularly suited for the modern minimalist: the professional who needs manicured hands for a presentation but cannot wear long extensions daily, or the enthusiast who changes their aesthetic as often as their wardrobe. If you are attempting press on nails first time, you are not merely gluing on plastic; you are applying a temporary, structured prosthetic that mimics the natural apex of the nail.
The appeal lies in the control. You dictate the length, the shape, and the finish, achieving a result that looks indistinguishable from a ninety-minute gel service, all from the comfort of your vanity.

What this nail style looks like in real life
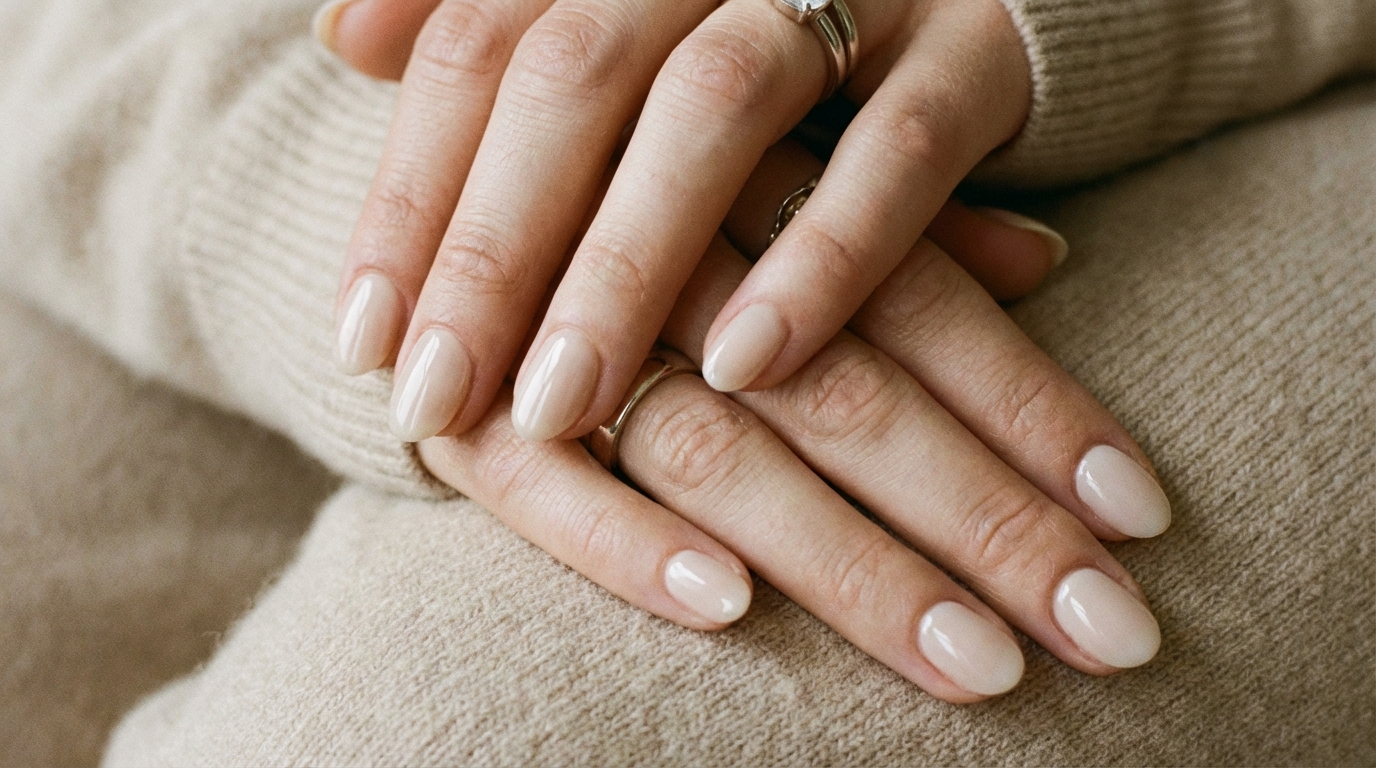
To the untrained eye, a high-quality press-on manicure is invisible. It does not look like a “sticker” or a plastic tab sitting on top of the finger. Instead, it mimics the visual properties of soft gel or BIAB (Builder In A Bottle).
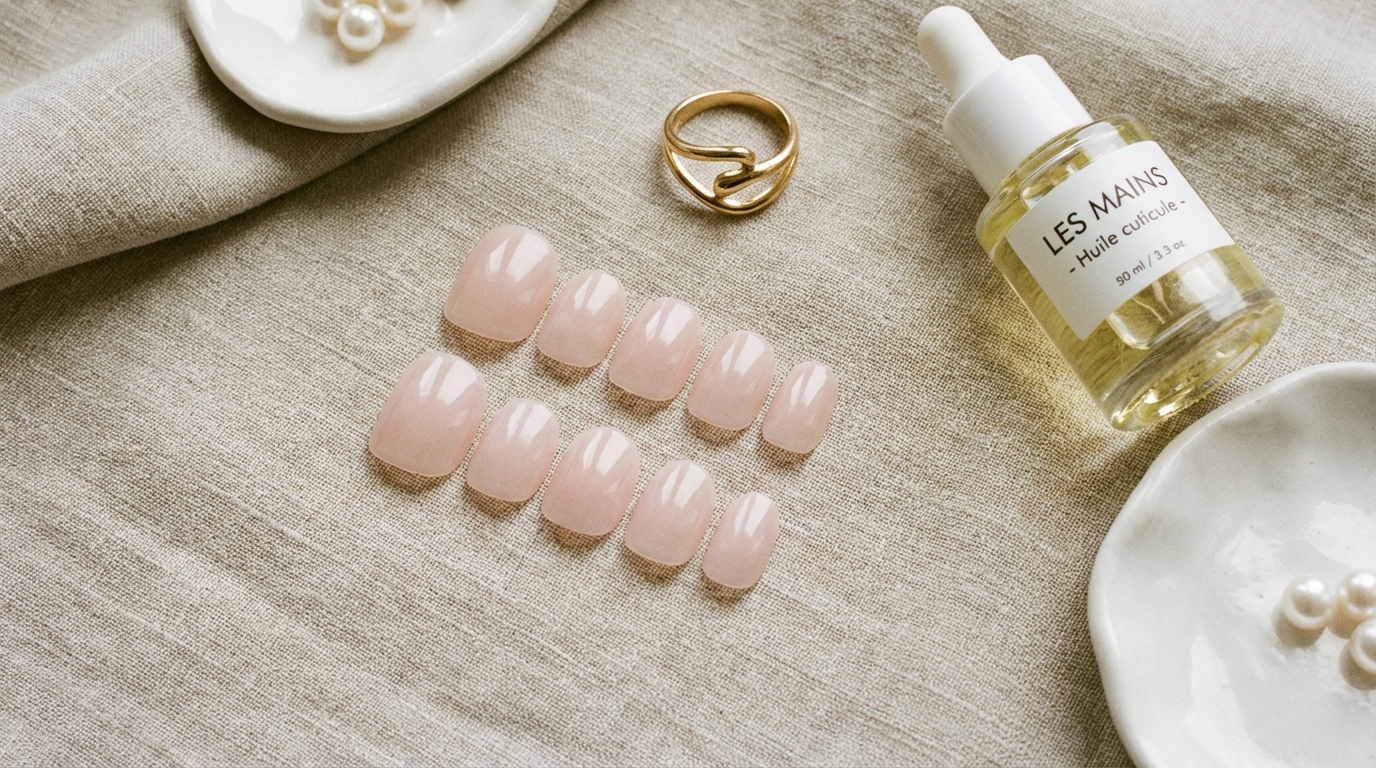
Color and Opacity: The most sophisticated press-ons utilize multi-dimensional pigments. They aren’t flat blocks of color. Whether you choose a milky sheer pink, a translucent jelly nude, or a deep opaque Bordeaux, the color has depth. The best sets often feature a slightly sheerer application near the cuticle area, mimicking how natural nails grow, which tricks the eye into believing the enhancement is originating from the matrix.
Finish: The hallmark of this look is a high-gloss, glass-like reflection. This isn’t the dull shine of standard plastic; it is the wet-look finish of cured UV topcoat. The light should travel in a straight, unbroken line from the cuticle to the free edge.
Shape and Architecture: Unlike the flat, flared plastic nails of the early 2000s, modern press-ons possess a “C-curve” (the arch viewed from the tip) and an “apex” (the highest point of the nail bed). This structural tapering prevents the nails from looking like wide shovels and instead gives them a slender, elongated appearance that flatters the finger.

Nail Style Profile
| Feature | Description |
|---|---|
| Color Family | Neutral Nudes, Milky Whites, Soft Pinks, Deep Classics |
| Opacity | Semi-sheer to Opaque (depending on style) |
| Finish | High-Gloss Gel, Jelly, or Soft Satin |
| Ideal Nail Length | Short to Medium |
| Ideal Nail Shape | Soft Almond, Squoval, or Tapered Square |
| How Natural It Looks | Very Natural (with proper cuticle blending) |
| Best For | Office, Weddings, Photo Shoots, Weekend Wear |
Why “press on nails first time” is so popular for everyday nails
The surge in popularity regarding press-on nails is not a trend; it is a correction in the beauty market. Clients are increasingly concerned about the long-term health of their natural nail plate. Traditional acrylics and improper e-file removal can lead to thinning and sensitivity. Press-ons offer a protective barrier.
Beyond health, the realism is key. We have moved past mass-produced ABS plastic into the era of hand-painted, soft-gel tips that offer flexibility. When you apply press on nails first time properly, you notice they move with your natural nail rather than fighting against it. This flexibility prevents the painful “pop-off” sensation and allows for a wear time that rivals traditional polish, with zero drying time.

How to get this nail look
At a nail salon
Interestingly, you can achieve the visual equivalent of a high-end press-on at a salon. If you love the look but aren’t ready to DIY, ask your technician for Gel-X or Soft Gel Extensions. These are essentially full-cover tips made of gel, adhered with gel.
- Show Photos: Bring images of “clean girl aesthetic” nails or “structured gel manicures.”
- What to Avoid: Avoid traditional acrylics if you want this specific look. Acrylic is thicker and can look bulkier if not sculpted by a master. Ask for “tapered cuticles” to ensure the regrowth looks natural.
At home
Achieving this at home comes down to material selection. Avoid stiff, brittle plastic tips found in drugstores. Look for brands that label their products as “gel tips” or “soft gel.” These are thinner at the cuticle (for a flush fit) and thicker at the free edge (for durability).

Step-by-step application for the most natural result
The difference between a press-on that lasts two hours and one that lasts two weeks is entirely in the preparation. Treat this process like a surgical procedure—cleanliness and dehydration are your best friends.
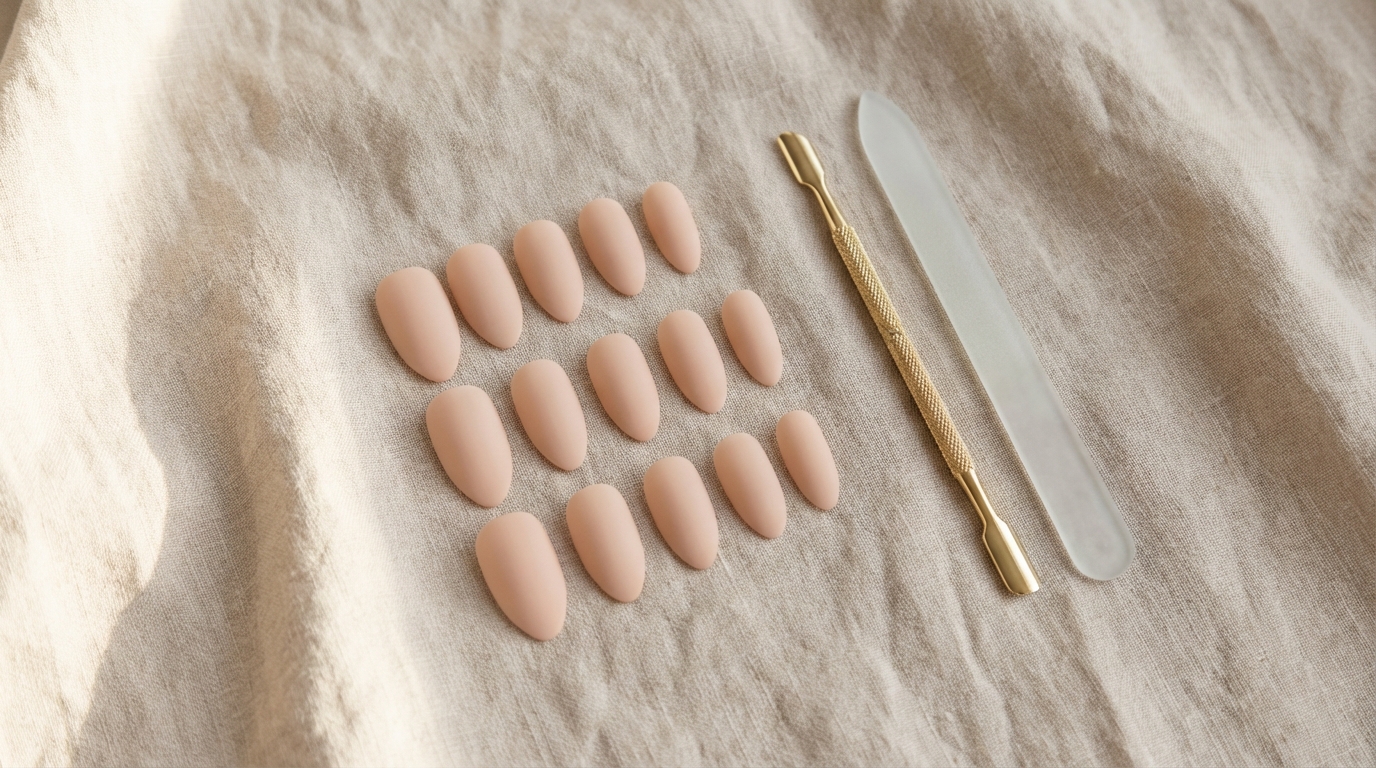
1. The Canvas: Cuticle Work
Your goal is to create more surface area. Gently push back your eponychium (cuticle) using a stainless steel pusher or orange wood stick. You want to expose the entire nail plate. If you have invisible dead skin on the nail plate, the glue will adhere to the skin, not the nail, causing immediate lifting.
2. Surface Texture
Lightly buff the surface of your natural nails. You are not trying to thin them; you are simply removing the natural shine (lipids) to create a rough texture for the adhesive to grip. A 180-grit buffer is ideal here.
3. Dehydration (The Pro Secret)
Pro Tip: Cleansing with soap and water isn’t enough. Wipe your nails vigorously with 91% Isopropyl Alcohol or 100% Acetone. This removes deep-seated oils that water can’t touch. Once you do this, do not touch your hair or face.

4. Sizing and Shaping
Measure every finger before you open the glue. The press-on should fit sidewall to sidewall without force. If you are between sizes, always choose the larger size and file the sides down. A tip that is too small will pop off as your natural nail flattens out.
If you have naturally flat nail beds, standard curved press-ons may create air pockets. In this case, I highly recommend looking into specific flat nail press-ons which are engineered to sit flush against flatter plates without painful pressure.
5. The Application Angle
Apply a drop of glue to your natural nail and a small dot to the back of the press-on tip. Align the press-on at a 45-degree angle near your cuticle. Slide it down until it tucks under the cuticle fold slightly, then press down slowly to the free edge. This creates that seamless, “growing out of the skin” look.
Hold firmly for at least 30 seconds. Do not just press the top; press the sides (sidewalls) to ensure a watertight seal.

Common mistakes that make nails look fake or bulky
Even with the best kit, technique errors can ruin the illusion.
- The “Flooded” Cuticle: Using too much glue causes it to seep out the sides. When it dries, it turns white and crusty, which is a dead giveaway. Use precision nozzles or brush-on glue for control.
- The Ridge: If the press-on is too thick at the base, you will see a harsh ridge where the plastic meets your skin. If your press-ons are thick, lightly file the back edge of the prosthetic nail before applying to thin it out.
- Wrong Undertone: Nude isn’t one color. A cool-toned pink skin type wearing a yellow-based beige nail will look “off.” Match the nail bed color to your skin’s undertone, just as you would foundation.
- Poor Fit: Forcing a curved nail onto a flat bed creates tension. Read more about finding the right fit in our guide on Press-On Nails vs Acrylic Nails to understand structural differences.

Maintenance and longevity
A well-applied set should last 10 to 14 days. To maintain that high-gloss finish, treat your hands like jewels, not tools.
Water is the enemy of adhesive. While you can shower, avoid soaking in hot baths or doing dishes without gloves. The heat and moisture expand the natural nail, breaking the glue bond. Daily hydration is also vital. Apply cuticle oil twice daily. It keeps the press-on flexible and prevents the surrounding skin from looking dry, which enhances the realistic appearance.
According to beauty experts at Byrdie, keeping the cuticles hydrated is also the single best way to extend the life of your manicure by preventing the lifting that occurs when skin pulls away from the adhesive.

FAQ
Will press-on nails damage my natural nails?
Not if removed correctly. Damage comes from ripping the nails off, which peels layers of your natural keratin. Always soak them off in warm soapy water and oil, or pure acetone if you don’t plan to reuse them.
Can I shower with press-on nails?
Yes, but wait at least two hours after application before getting them wet to allow the adhesive to fully cure. Avoid prolonged submersion in hot water.
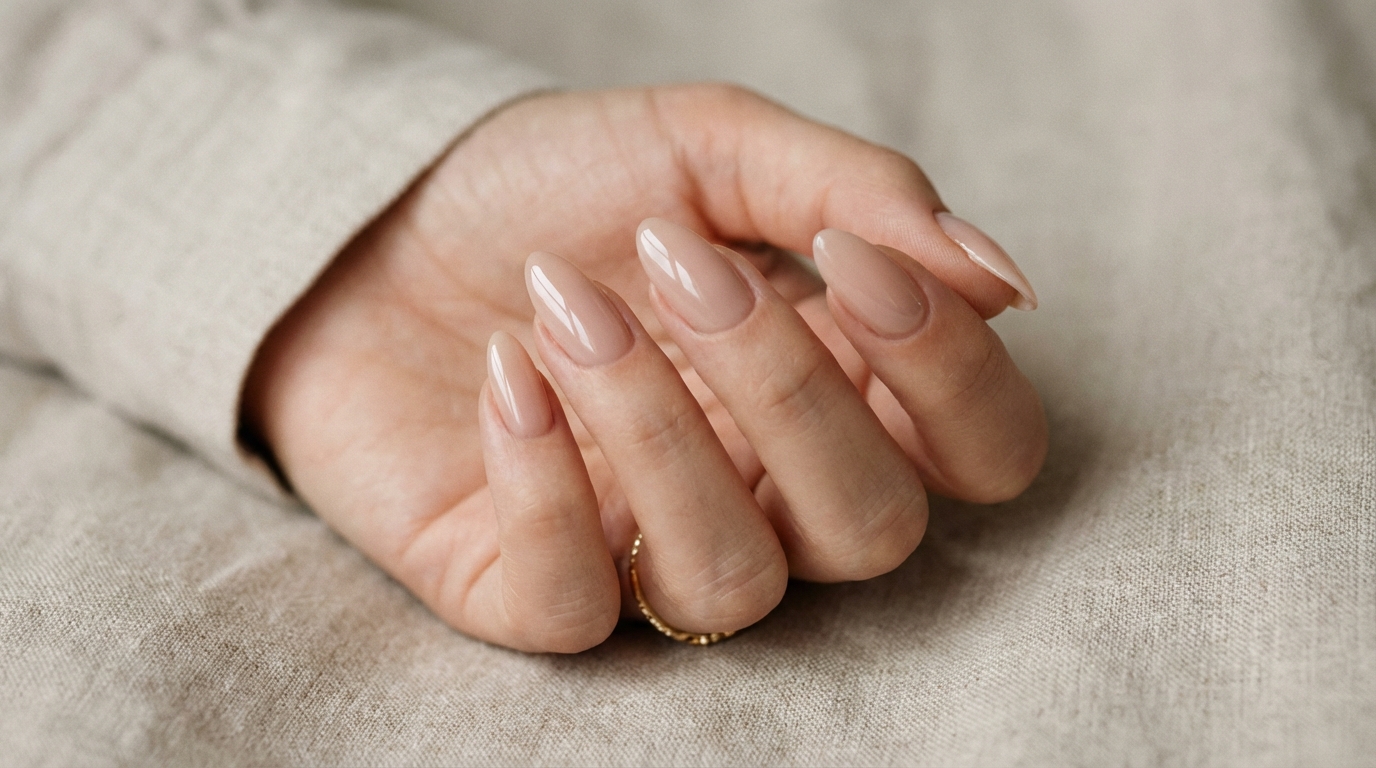
Which shape looks most natural?
For a “your nails but better” look, a short Squoval (soft square) or a short Almond shape mimics natural growth patterns best. Long coffins or stilettos are beautiful but clearly enhanced.
Why do my press-ons pop off after one day?
90% of the time, this is due to oil on the nail plate during prep. Ensure you thoroughly dehydrate the nail with alcohol and buff the shine away before applying glue.
Conclusion
Applying press on nails first time can feel intimidating, but it is a skill that rapidly improves with practice. The result—a pristine, durable, and elegant manicure—is worth the initial patience. By focusing on proper sizing, thorough preparation, and cuticle health, you elevate a simple beauty product into a professional-grade aesthetic experience. Trust your hands; they are capable of creating art.